How to Repair Drywall Corner Beads: Step-by-Step Guide for a Flawless Finish

Edward Fisher • May 27, 2025

Drywall corner bead repair is a common yet often frustrating task for homeowners. Over time, corners can chip, crack, or become damaged due to everyday wear and tear or accidental impacts. These unsightly imperfections not only detract from a room’s aesthetics but can also lead to more significant issues if left unaddressed.


Understanding the importance of maintaining these corners is crucial for preserving the integrity of drywall installations. Homeowners often find themselves searching for effective solutions to restore their walls to pristine condition. Whether it's a minor repair or a more extensive restoration, knowing how to tackle drywall corner bead repair can save time and money while ensuring a polished finish that enhances the overall look of a home.


Overview of Drywall Corner Bead Repair

Drywall corner bead repair addresses common damage to corners, essential for maintaining property aesthetics and structural integrity. Proper repair techniques restore functionality and extend the lifespan of drywall installations.


Importance of Corner Bead

Corner beads provide reinforcement and protection at drywall corners. They help prevent chipping, cracking, and damage from impacts, ensuring durability. Maintaining intact corner beads enhances the visual appeal of walls and contributes to a polished finish. Properly installed and maintained corner beads also comply with building codes, promoting long-term structural integrity.


Common Issues with Corner Beads

Corner beads often face several issues, including dents, cracks, and peeling paint. Dents occur due to accidental impacts with furniture or equipment, while cracks can develop from settling or temperature fluctuations. Peeling paint typically results from moisture exposure or improper application. Identifying and addressing these common issues promptly prevents further damage, ensuring the longevity of drywall corners.


Tools and Materials Needed

For drywall corner bead repair, specific tools and materials facilitate efficient and effective restoration. Utilizing the correct items ensures a smooth repair process.


Essential Tools

  • Utility Knife: Cuts drywall or corner bead accurately.
  • Taping Knife: Spreads joint compound smoothly over the repair.
  • Putty Knife: Fills small gaps and applies joint compound to tight spaces.
  • Drywall Saw: Allows for cutting drywall to fit around corner areas easily.
  • Measuring Tape: Ensures precise measurements for accurate cuts.
  • Screw Gun: Secures corner bead to the drywall effectively.


Recommended Materials

  • Corner Bead: Provides structural support and protects corners from damage.
  • Joint Compound: Fills gaps and creates a seamless finish on the repairs.
  • Drywall Tape: Reinforces joints and binds the materials together securely.
  • Primer: Prepares the surface for paint, ensuring smooth coverage.
  • Paint: Matches the wall color after repairs, restoring the aesthetic.


Using these tools and materials guarantees effective drywall corner bead repair, enhancing the integrity and appearance of the home.


Step-by-Step Repair Process

Man fixing a wall

Repairing drywall corner beads involves a precise approach to ensure a seamless finish. Follow these steps for an effective repair.


Preparing the Area

Clearing the workspace ensures safety and efficiency. Remove furniture and cover the floor with a drop cloth. Inspect the corner bead for visible damage. Gather all necessary tools, including a utility knife, putty knife, and joint compound. Safety equipment like gloves and goggles is essential to protect against debris and dust during repairs.


Removing Damaged Corner Bead

Cut through the damaged corner bead using a utility knife. Score along the fastening points to detach it cleanly. Use a putty knife to pry away any remaining pieces gently. Inspect the underlying drywall for damage. If the drywall is compromised, patch the area before installing a new corner bead.


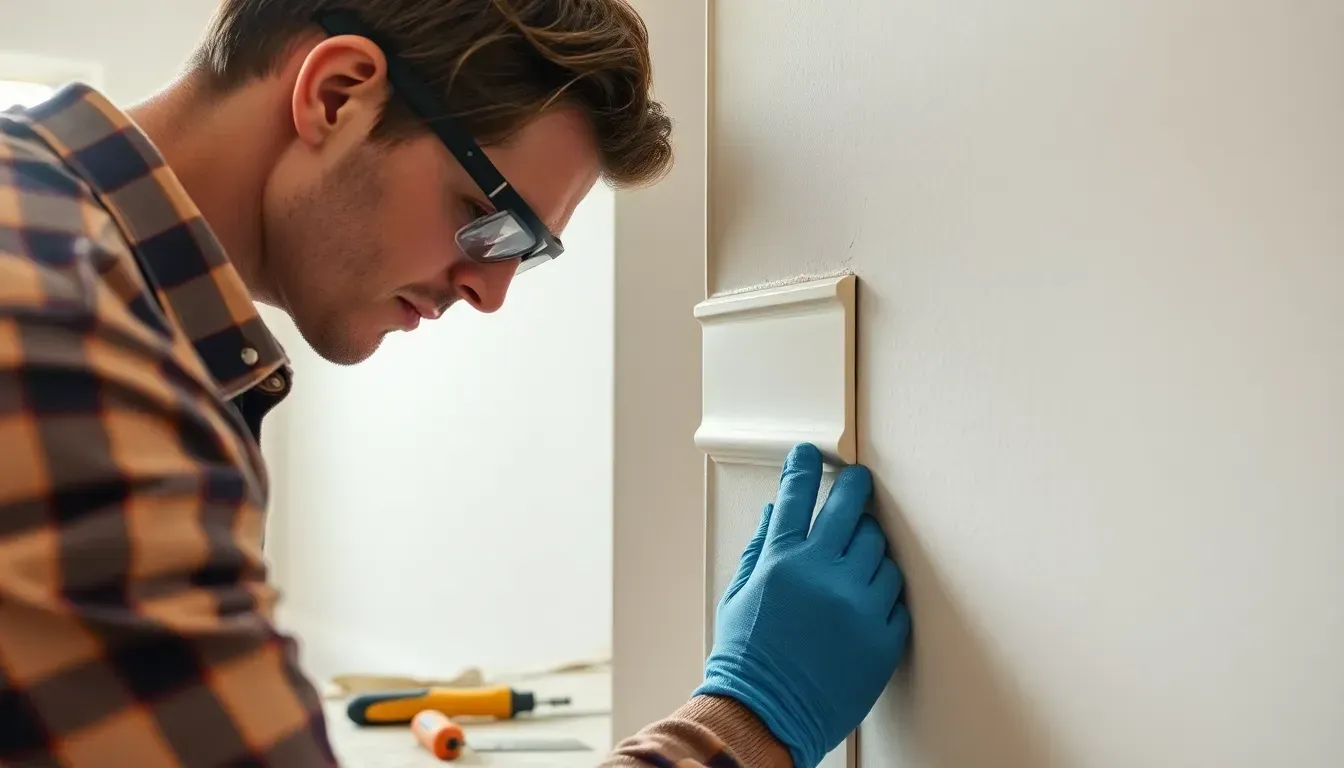
Installing New Corner Bead

Position the new corner bead flush against the drywall. Secure it with drywall screws, placing screws about 12 inches apart. Apply a bead of joint compound along the edges of the corner bead. Smooth the compound with a putty knife, ensuring it adheres properly and covers all edges. Allow the compound to dry completely before sanding.


Finishing Touches

Sand the dried joint compound to create a smooth finish. Apply a second coat of joint compound if necessary for a flawless surface. Once dry, sand again to reach the desired smoothness. Prime and paint the repaired area to match the surrounding wall, restoring the visual appeal. Regular maintenance of corner beads prevents future damage.


Tips for Successful Repairs

Successful drywall corner bead repair ensures durability and aesthetic appeal. Adhering to best practices minimizes the risk of future damage.


Best Practices

  • Preparation: Clear the area thoroughly before starting repairs, ensuring safety and access to work.
  • Inspection: Examine the existing corner bead for any hidden damages before installation.
  • Tools: Use appropriate tools like a taping knife and utility knife to achieve clean cuts and finishes.
  • Technique: Apply joint compound smoothly, feathering the edges to blend with the surrounding wall.
  • Painting: Choose a paint that matches the existing wall to maintain a uniform appearance.


Avoiding Common Mistakes

  • Rushing: Taking time during each step to ensure proper installation prevents mistakes.
  • Poor adhesion: Always ensure the corner bead is securely attached to avoid future dislodging.
  • Skipping primer: Apply primer before painting to enhance adhesion and durability of the final coat.
  • Neglecting sanding: Proper sanding of the joint compound offers a smooth surface, crucial for a professional finish.
  • Ignoring drying time: Allow adequate time for each layer to dry before proceeding to the next step.


These tips promote successful drywall corner bead repair, enhancing structural integrity and aesthetics.


Conclusion

Drywall corner bead repair is essential for maintaining the integrity and appearance of walls. Addressing damage promptly not only prevents further issues but also enhances the overall aesthetic of a home. With the right tools and techniques, homeowners can confidently tackle repairs, ensuring their walls remain sturdy and visually appealing.


By following best practices and avoiding common mistakes, the repair process becomes more efficient and effective. Regular maintenance of corner beads will extend the life of drywall installations, safeguarding against future damage. Ultimately, investing time in these repairs pays off in a polished and well-maintained living space.


Frequently Asked Questions


What is a drywall corner bead?

A drywall corner bead is a protective strip installed at the corners of drywall to reinforce them against damage, such as chipping or cracking. It helps maintain the wall's structural integrity and enhances the visual appeal.


Why do drywall corners get damaged?

Drywall corners can become damaged due to normal wear and tear, accidental impacts, or improper handling during installation. Over time, these factors can lead to dents, cracks, or peeling paint.


How can I fix a damaged drywall corner bead?

To fix a damaged corner bead, first remove the damaged section, inspect the underlying drywall, and then securely install a new corner bead. Finish by applying joint compound, sanding, priming, and painting.


What tools and materials do I need for corner bead repair?

You will need a utility knife, taping knife, putty knife, drywall saw, measuring tape, and screw gun. Recommended materials include corner bead, joint compound, drywall tape, primer, and paint.


How can I prevent future damage to my drywall corners?

To prevent future damage, regularly inspect your corner beads, properly maintain walls, and handle objects near corners with care. Promptly address any signs of wear or damage to ensure longevity.


What common mistakes should I avoid during the repair process?

Avoid rushing the repair, neglecting proper adhesion, skipping primer, and ignoring drying times. Each step is crucial for a quality repair and ensuring the longevity of your drywall corners.


How do I achieve a smooth finish when repairing corner beads?

Achieve a smooth finish by carefully applying joint compound, allowing it to dry completely, and sanding it down evenly. Finally, apply a coat of primer before painting to ensure a uniform appearance.


Is it necessary to paint after repairing a corner bead?

Yes, painting after repairing a corner bead is essential for both aesthetics and protection. A fresh coat of paint helps blend the repair with the surrounding wall and protects the joint compound.

Dry wall cracks
By Edward Fisher May 28, 2025
Tired of drywall cracks that keep coming back? Learn the real reasons behind recurring cracks and how to fix them for good with proven, long-lasting solutions.
Man crouching on the floor with paint
By Edward Fisher May 27, 2025
Learn how to fix drywall holes quickly and easily with this step-by-step guide. Restore your walls and improve your home’s appearance in no time.
By Edward Fisher May 24, 2025
Water damage can wreak havoc on a home, especially when it comes to drywall. Homeowners often face the frustrating challenge of identifying the source of the leak, dealing with mold growth, and figuring out the best way to repair the damage. With drywall being a key component of interior aesthetics and insulation, addressing these issues promptly is crucial to maintain both safety and comfort within the home. Fixing water-damaged drywall isn't just about patching up holes; it involves understanding the underlying issues that caused the damage in the first place. From leaks in plumbing to roof problems, homeowners need a comprehensive approach to ensure lasting solutions. Fortunately, with the right knowledge and tools, it's possible to restore your walls and protect your home from future damage. Overview of Water Damaged Drywall Water-damaged drywall often manifests as discoloration, sagging, or peeling paint. Identifying the source of water intrusion is crucial, as unresolved leaks can lead to further damage and mold growth. Common sources of water damage include plumbing leaks, roof leaks, or flooding. Addressing these issues promptly prevents extensive repairs and enhances safety. Repairing water-damaged drywall involves several steps. First, assess the extent of the damage. Minor issues may require patching and repainting, while severe damage necessitates replacing entire panels. Next, dry out the affected area using fans or dehumidifiers to mitigate mold growth. After ensuring the area is dry, cut out the damaged sections using a utility knife. Install new drywall according to local building codes. Secure it properly to the studs, ensuring a level surface. Apply joint compound and tape to seams for a seamless finish. Sand the surface once dry, and paint to match the existing wall. Implementing preventive measures is essential to avoid future water damage. Regular inspections of plumbing and roofing systems catch issues before they escalate. Homeowners should also consider installing moisture detection systems to alert them of potential leaks. For effective remediation, consulting professionals experienced in fixing water-damaged drywall is advisable. Their expertise ensures compliance with regulations and enhances the durability of repairs. Causes of Water Damage
Man holding a book in the middle of a room
By Edward Fisher May 22, 2025
Preparing your home for handyman construction work can feel overwhelming. Homeowners often face frustrations like unclear timelines, unexpected costs, and the disruption of daily routines. Whether it's a small repair or a major renovation, the thought of having workers in your space can add to the stress. However, taking the right steps can make the process smoother and more efficient. By understanding the importance of proper preparation, homeowners can minimize disruptions and ensure that their projects run as smoothly as possible. With expert guidance and practical tips, this article will help you navigate the preparation process, setting the stage for a successful handyman experience. Understanding Handyman Construction Work Handyman construction work encompasses a variety of services designed to assist homeowners in maintaining and improving their properties. These tasks range from minor repairs to significant renovations and ensure the home remains functional and aesthetically pleasing. Types of Handyman Services Handyman services include various specialties aimed at addressing different needs. Common types encompass plumbing repairs, electrical installations, drywall repair, paint jobs, and carpentry work. Homeowners may also require seasonal maintenance tasks, such as gutter cleaning and HVAC servicing. These diverse offerings make handyman services a one-stop solution for many home improvement issues. Importance of Preparation Effective preparation streamlines handyman construction work and minimizes disruptions. Homeowners should compile a list of tasks, gather necessary materials, and clear work areas in advance. Communicating specific requests and expectations to the handyman ensures that the project aligns with the homeowner's vision. This level of organization contributes to smoother execution and better outcomes, ultimately leading to a more satisfying experience. Assessing Your Space
Handyman looking at large paper
By Edward Fisher May 21, 2025
Homeowners often find themselves overwhelmed when faced with repairs, renovations, or maintenance tasks. The decision between hiring a handyman or a contractor can lead to confusion and frustration, especially when considering costs, expertise, and the scope of work involved. Many struggle to understand which option best suits their needs, leading to uncertainty and potential delays in getting projects completed. Accurate Home and Commercial Services aims to alleviate these concerns by providing clear, reliable insights into the cost breakdown of handyman versus contractor services. With over 25 years of experience, their knowledgeable team helps homeowners navigate the complexities of property evaluations and repairs, ensuring a stress-free process. By offering accurate assessments and tailored solutions, they empower homeowners to make informed decisions, ultimately leading to successful home improvement projects. Overview of Home Repair Options Homeowners often face two primary options for repairs: hiring a handyman or contracting a professional . Each option has unique advantages, depending on the scope and complexity of the work involved. Handyman Services Handyman services typically cover minor repairs and maintenance tasks. These tasks may include plumbing fixes, electrical work, carpentry, and painting. Handymen offer flexibility in scheduling and can often complete multiple tasks in a single visit, which can save time. Homeowners looking for quick fixes or general maintenance typically find handymen to be cost-effective and reliable. Contractor Services Contractors excel in managing larger renovation and construction projects. They possess specialized skills and knowledge, making them ideal for significant updates such as room additions, remodels, or extensive repairs. Contractors typically oversee subcontractors and ensure compliance with local building codes. Homeowners requiring extensive renovations or who seek structural alterations typically lean towards hiring licensed contractors. Comparison of Options The choice between handyman and contractor largely depends on the project’s requirements. Handymen supplement the needs of homeowners for minor repairs and routine maintenance. Contractors cater to complex projects requiring detailed planning and labor-intensive skills. Evaluating the level of expertise required, timeline, and overall budget assists homeowners in making informed decisions. When considering options for home repairs or renovations, weighing the specific needs of the project facilitates choosing the best service route. Ultimately, aligning the complexity of the repairs with the appropriate service sets the groundwork for successful home improvements.  Cost Comparison Between a Handyman and Contractor
Man in construction helmet
By Edward Fisher May 21, 2025
Planning a small construction project? Discover 5 common code violations that could cost you big—and learn how to avoid them before they delay your build.
Woman in a kitchen touching the sink
By Edward Fisher May 19, 2025
Boost your home's value with these 7 small construction projects that impress both home inspectors and appraisers. Simple upgrades, big impact—see what works.
By Edward Fisher May 19, 2025
Did you path of travels also need to be inclusive and accessible to everyone? Many face frustrations with compliance standards and the intricacies of ensuring their facilities are accessible to all. These inspections are critical in identifying potential barriers that could hinder individuals with disabilities, making it essential to understand the requirements and processes involved. Overview of ADA Path of Travel Inspections ADA Path of Travel Inspections assess a property's accessibility, ensuring compliance with the Americans with Disabilities Act (ADA) standards. These inspections evaluate the routes that individuals with disabilities use to navigate through facilities. Accessibility barriers can inhibit movement, so systematic evaluations identify areas needing improvement. Inspections cover key features like entrances, exits, pathways, and other crucial elements. Engaging with licensed professionals ensures thorough assessments, leading to revised plans that address non-compliance issues. Inspectors check compliance with minimum width requirements, appropriate slopes, and surface stability. Property owners benefit from these inspections as they highlight legal obligations and enhance facilities to be more inclusive. Accurate Home and Commercial Services provides expert evaluations for properties in the Greater Houston area, assisting with compliance efforts. Clients receive tailored recommendations based on findings, allowing effective remedial action. Inspections play a critical role for projects exceeding $50,000. TDLR mandates registration with plan reviews and TAS inspections before construction. Involvement of RAS-certified inspectors guarantees adherence to accessibility protocols. Understanding the importance of a clear and accessible path of travel creates an environment where every individual, regardless of ability, can navigate with ease. Trust Accurate Home and Commercial Services for comprehensive ADA Path of Travel Inspections in Greater Houston, ensuring compliance and inclusivity.  Importance of Compliance
Handyman at work
By Edward Fisher May 17, 2025
Find out which handyman services require permits before you hire. Learn about common rules, exceptions, and how to avoid costly violations.
Man in reflective jacket with a notebook in hand
By Edward Fisher May 14, 2025
Ensure ADA compliance after construction! Our guide covers post-construction inspections for accessible signage, paths, and more.